Introduction
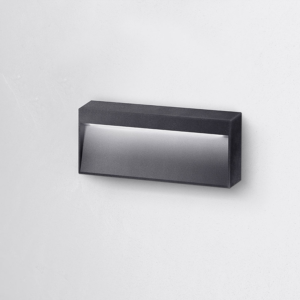
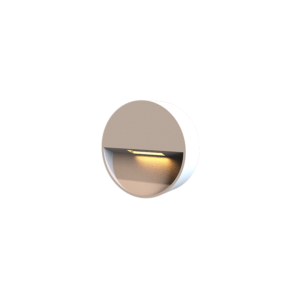
Courtyards, driveways, stairways …… These everyday scenes are being revitalized by in ground LED lights installation. Whether it is to create a cozy outdoor atmosphere, or to improve the safety of walking at night, embedded LED lights are becoming the “invisible assistant” of home beautification. However, in the face of cement trenching, waterproof treatment, power wiring and other technical aspects, many users have concerns: how to ensure that the lamps and lanterns long-term waterproof? Is low-voltage power supply safe? How to solve the hidden wiring?

Why do I need professional guidance?
Buried lights are unique in that they are “semi-permanent” installations – once buried in the ground, the cost of reworking them is extremely high. If the waterproof treatment is not appropriate, the lamps may be short-circuited due to water seepage; if the power access is not standardized, there is a risk of electric shock. This article will help you avoid these problems in advance through a structured process, so that every light becomes a “peace of mind”.
Preparation before installation (Before You Begin)

Determine the installation location (function + aesthetics)
- Prioritize function: Divide the area according to the use (e.g. courtyard ambient light needs to avoid high-frequency stepping area, driveway light needs to be arranged in a straight line to guide the line of sight).
- Aesthetics: Use the light angle to highlight the focus of the landscape (e.g. 30° beam angle for flower bed edges, 60° wide angle for walkways).
- Hidden wiring: plan the path of ground light wiring in advance to avoid damaging the line for future gardening construction.
Check the type of power supply (voltage selection = safe basis)
- High voltage (110V/220V): suitable for long distance wiring, but need professional electrician to install leakage protection device.
- Low voltage (12V/24V): Recommended for DIY users, reduce voltage through transformer to reduce the risk of electric shock (⚠️ highlights “safe installation tips”).
- Waterproof junction box: Regardless of the voltage, outdoor wiring must use an IP68 rated waterproof box to prevent rainwater penetration.
Know your local electrical code (compliance = long term safety)
- Burial Depth: Most areas require cables to be buried at least 18 inches into the ground (shovel-proof).
- Conduit Protection: PVC conduit wraps around the line to prevent root growth or digging damage (key “ground light wiring” tip).
- License Requirements: Some areas require a licensed electrician to sign off on outdoor electrical work.
List of Tools Required for Installation (Prepare accurately to avoid rework)表格
| Tool | Doel | Associated | Remarks |
|---|---|---|---|
| Shovel/excavation tool | Excavate the light trench (depth = height of light body + 2cm) | Ground wiring pre-treatment | |
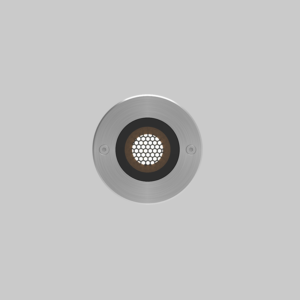
| Waterproof connector (heat-shrinkable tube + silicone sealing) | Connecting cables and lamps, IP68 rated against water seepage | “safe installation tips” Core | |
| Electric drill (with glass drill bit) | If the luminaire is to be fixed on a concrete floor | Installation tips for hard floors | |
| Multimeter | Test voltage/short-circuit after installation (⚠️ Power failure operation!) | Electrical safety testing | |
| Insulation tape + labeling machine | Marking the route of the line for later maintenance | Wiring management |
Safety Precautions (Zero Accident Installation Rules)
- Power failure operation: turn off the main switch before installation, use a multimeter to make sure there is no electricity (⚠️ Life safety first).
- Protective equipment: gloves to prevent cuts, goggles to prevent splashes (especially when cement trenching).
- Children / pets isolation: construction area with warning signs to avoid accidental contact with tools or electrified parts.
- Emergency plan: Prepare fire extinguishers (to prevent short-circuit sparks), and memorize the emergency contact information of local electricians.
Step-by-Step Installation Process
Step 1: Mark the location of the lamps and lanterns (precise planning to avoid reworking)

- Spacing recommendation: 1~1.5 meters for functional lighting (e.g. driveway), decorative lighting (e.g. flower beds) can be relaxed to 2 meters (⚠️ too close spacing is easy to cause light pollution).
- Path optimization: Mark the location with chalk or spray paint to ensure the cable path avoids drainage ditches and tree root areas (to reduce future maintenance costs).
Step 2: Excavate the lamp hole (depth + drainage = life guarantee)

- Hole size: depth is 2~3cm higher than the lamp body (reserve space for cables), diameter is 5cm wide (easy to dissipate heat).
- Drainage layer: 5cm of crushed stone/gravel at the bottom to form a natural seepage layer (⚠️ humid environment needs to be thickened to 10cm to avoid water vapor corrosion of the lamp body).
- Routing groove: excavate a shallow groove (depth of 5cm) along the side of the lamp hole, used to hide the cable (to reduce the risk of damage by stepping on it).
Step 3: Laying cables (waterproof and tensile are the core)
- Cable Selection: Use double insulated buried cable (e.g. FT2 grade), with outer jacket labeled “UV resistant” for better aging resistance.
- Waterproof connection:
- Low-voltage system: T-branch connector + heat-shrinkable tube sealing (⚠️ must use the IP68 waterproof connector emphasized in the “waterproof LED installation steps”).
- High-voltage system: inject insulation sealant after wiring, and then wrap 3 layers of waterproof tape around the outer layer.
- Tensile design: Fix the cable with U-shaped nails every 50cm, and the radius of the corner is ≥10cm (anti-breakage).
Step 4: Wiring and testing (details determine success or failure)

- Polarity differentiation: the red wire of low-voltage lamps connects to the positive pole (+), and the black wire connects to the negative pole (-), and misconnection may lead to non-lighting or damage to the lamps and lanterns (⚠️ mark the cables with a labeling pen).
- Waterproofing: Reserve 5cm of remaining wire in the junction box, inject waterproof glue and then cover tightly (to avoid pulling resulting in poor contact).
- Power on test:
- Use multimeter to check the voltage (low voltage system should show 12V/24V, high voltage is 110V/220V).
- Briefly power on the lamp to check whether it lights up normally (⚠️ power off immediately after the test to prevent the driver from being burned by no load).
Step 5: Lamp fixing and ground backfilling (solid + beautiful)

- Fixing method:
- Soft soil area: Directly backfill the soil and compact it.
- Cement floor: use electric drill + glass drill bit to open holes, use expansion screws to fix the base.
- Surface treatment: after backfilling, calibrate the light surface with a level ruler, ≤2mm above the ground (to prevent water accumulation), and pave the periphery with the same material as the ground (e.g. slate, gravel).
Step 6: Energized test (final acceptance)

- Function test: switch on and off 3 times in a row, check whether there is flickering or extinguishing (⚠️ flickering may be poor contact or unstable voltage).
- Intelligent function: If the lamps are equipped with light control/sensor, cover the sensor with your hand or dim the ambient light to verify the automatic opening and closing function.
- Pressure test: Simulate rainy weather, use water hose to flush the area of the fixture, observe whether water enters into the fixture within 24 hours (⚠️ key “waterproof LED installation steps” to verify).
Installation FAQs (Troubleshooting & FAQs)
Q1: Why doesn’t the light turn on?
- Wiring error: Check whether the positive and negative poles are reversed (low voltage system is especially sensitive), reconnect and fix it with insulating tape.
- Power supply failure: Test the transformer/driver output voltage with a multimeter (low voltage system should show 12V/24V).
- Damaged lamps: test individual lamps by powering them up individually, if they don’t light up then they need to be replaced (⚠️ keep the box for return).
- Waterproof failure: check the junction box for water seepage (disassemble, dry and reapply waterproof glue).
Q2: What should I do if the cable length is limited?
- Extension program: Use outdoor cables with the same specification as the original cable and connect them through waterproof connectors (IP68 grade) to avoid direct splicing.
- Voltage limitation: The total cable length for low-voltage system (12V) is recommended to be no more than 15 meters (otherwise you need to upgrade the wire diameter or install additional power supply).
Q3: Can I install it in rainy days?
- Actionable steps: Marking the position and digging the holes can be done, but wiring and power-on test need to be completed in a dry environment.
- Risk Avoidance: Temporarily cover the work area with plastic sheeting to prevent rainwater from pouring into the unsealed junction box.
- Post-installation test: You must wait until the luminaire area is completely dry before energizing (⚠️ It is recommended to delay the test for 24 hours after installation on a rainy day).
Q4: How to prevent water from accumulating?
- Double drainage design: 5cm gravel layer at the bottom of the luminaire + drainage holes on the side (some models come with a breather valve).
- Ground slope: Make sure the position of the fixture is 2-3mm lower than the surrounding ground when installing to guide the water flow to avoid it.
- Regular maintenance: check the seal ring every year for aging, clean the drainage channel (especially in the area of leaf accumulation).
Q5: What floor materials are suitable?表格

| Materiaal | Installation method | Precautions |
|---|---|---|
| Concrete | Make holes with a core drill and embed expansion screws | Reserve an access opening (e.g., with a square cover plate) |
| Grass | Excavate and bury directly, backfill with compacted soil | Avoid sprinkler systems to prevent water pressure from distorting fixtures |
| Slate/tile | Cut holes with a glass drill and fill with sealant | Select a fixture bezel that matches the color of the floor |
| Wooden flooring | Customized waterproof base and screws are required to avoid cracks caused by thermal expansion and contraction |
Installation Suggestions and Tips (Pro Tips for a Better Setup)
Tip 1: Prioritize low-voltage system, safe DIY from the source!
- Advantage of 12V/24V low voltage: almost no risk of electric shock even if accidentally touched, especially suitable for home users with no experience in electrician (⚠️ search “DIY in ground lighting install” to find low voltage kit recommendations).
- Transformer Selection: Select the transformer according to the total power of the lamps and lanterns (it is recommended to reserve 20% margin), to avoid overloading and heating.
- Concealed installation: Place the transformer in an outdoor waterproof box or in the garage, away from the direct rainfall area.
Tip 2: Use the “edge position” to extend the life of lamps and lanterns
- Avoid high-frequency activities: install the lamps in the edge of flower beds, corridors and other low-traffic areas to reduce the impact of trampling (⚠️ lawn lamps need to be buried at least 10cm deep to prevent shoveling).
- Utilize landscape screening: embed luminaires in step elevations or at the base of low walls to enhance the sense of ambiance through indirect lighting while reducing the risk of physical damage.
Tip 3: Intelligent control allows the light to “know what you need”.
- Timing + light sensor dual mode: automatically turn on the lights at sunset, dim the brightness at 3am (⚠️ search “landscape light control tips” to get the light sensor selection strategy).
- Zone management: Group the lights (e.g. “courtyard mode”, “holiday mode”) through cell phone APP, and switch the scene with one click.
- Sensor linkage: install microwave radar sensors at the entrance to realize the energy-saving effect of “lights on when people come and lights off when people leave”.
Tip 4: Regular Maintenance = Golden Rule for Longer Life
- Quarterly checklist:
- Clean leaves/dust from the surface of the fixture (to avoid poor heat dissipation).
- Check for hardened waterproof connector seals (deterioration requires immediate replacement).
- Test the response speed of intelligent control system (if the delay of light sense is more than 3 seconds, troubleshooting is required).
- Rainy season special care: press the edge of the lamp with a paper towel after a heavy rain and observe whether there is any water penetration (⚠️ water penetration needs to be disassembled and redo the waterproof layer).
Tip 5: Advanced Tips – Lighting Effect Optimization
- Beam angle match the scene:
- 15° narrow beam: highlight sculpture/tree focus.
- 30°~60° wide beam: pave the walkway or wall.
- Color temperature selection:
- 2700K warm white light: create a cozy courtyard.
- 4000K natural light: enhance driveway/driveway recognition.
- Dynamic effect: fade/chase effect through DMX controller (need to lay signal line in advance).