Introduction: Why Outdoor In-Ground Lights?
In modern outdoor design, which seeks to balance functionality with aesthetics, Outdoor In-Ground Lights are becoming the invisible artists that reshape the ambiance of a space. Subtly embedded in the ground, these fixtures cast a soft, discreet light that can outline a patio path or add dramatic light and shadow to a flower bed, water feature, or building façade. Its concealed design eliminates the abruptness of traditional fixtures, allowing the lighting itself to become part of the landscape.

Currently, landscape lighting trends are shifting from monofunctionality to immersive experiences, and the focus of modern outdoor lighting has shifted to energy efficiency, intelligence, and sustainability. LED technology has made underground lighting more energy-efficient, and intelligent controls allow users to switch color temperatures and brightness according to the scene. At the same time, minimalism and natural integration of design concepts promote buried lights becoming the courtyard transformation of the “finishing touch” — whether it is to create a quiet garden at night or to strengthen the sense of atmosphere of the outdoor social area. This type of lighting is a combination of science and art, redefining the boundaries of outdoor life. These fixtures are redefining the boundaries of outdoor living by combining technology and art.
What are Outdoor In-Ground Lights?
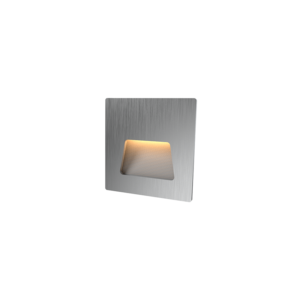
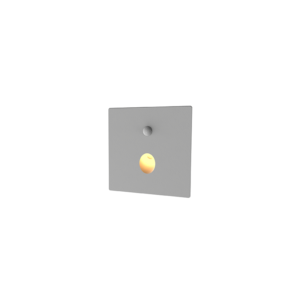
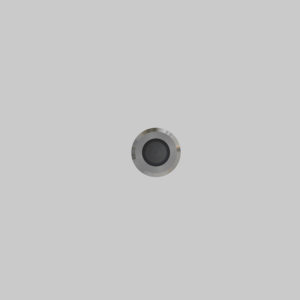
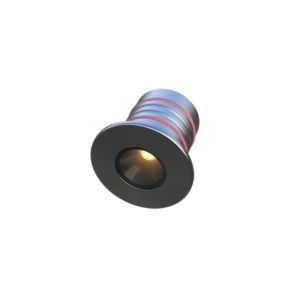
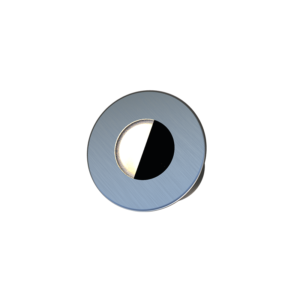
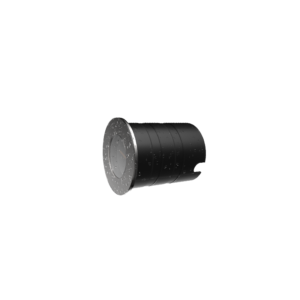
Outdoor In-Ground Lights are processed outdoor lights designed for outdoor environments, usually embedded in the ground or steps, with the light body flush with the ground surface, creating soft ambient lighting with indirect or diffused light. The core structure consists of a waterproof and rustproof housing (e.g., stainless steel or aluminum alloy) and a weather-resistant translucent cover, and the interior is mostly made of ground LED fixtures, which combines low energy consumption with a long lifespan. Some models support low voltage in-ground lights configuration to enhance safety through low voltage power supply system, especially suitable for patio, garden walkway, and other domestic scenes.

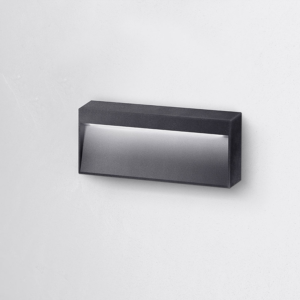
Compared with traditional outdoor lighting (such as spotlights or floodlights), the significant difference between in-ground lights is their hidden nature and the direction of the light effect: spotlights focus on a specific target (such as trees or sculptures) through the adjustable head, while floodlights cover a large area with a wide-angle glare; and the light of in-ground lights spreads upwards or in all directions to form an “invisible light source” to avoid glare interference, more suitable for the need to weaken the presence of light fixtures landscape design (such as water features edge or lawn accents). Its low-profile design can also reduce the risk of accidental collision, becoming the ideal carrier of the modern courtyard “see light, not see light” concept.
Explanation of the Main Types of Outdoor In-Ground Lights
LED In-Ground Lights
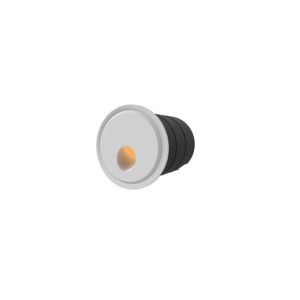
LED technology has become the core driver of outdoor lighting. LED ground lights are known for their high efficiency, with energy consumption of only 20% of traditional halogen lamps, but a life expectancy of up to 50,000 hours or more, significantly reducing the frequency of maintenance. They typically range from 3W to 18W and can be adjusted to suit the scene — low power (3-6W) for walkway edge accents and high power (12-18W) to illuminate the main courtyard or building façade.

Another advantage of energy-efficient in-ground lights is the controllable light color, with cool white (5000K) for functional lighting (e.g., driveway) and warm white (3000K) for a warm atmosphere (e.g., garden lounge). IP67-rated waterproof design ensures stable operation in rain and snow, making it the “basic standard” for modern garden lighting. The Solar-Powered In-Ground Light is the “basic standard” for modern garden lighting.
Solar-Powered In-Ground Lights
With no wiring and zero electricity costs, solar-powered outdoor in-ground lights are becoming the preferred choice of eco-friendly enthusiasts. With built-in monocrystalline silicon solar panels, these lights can be charged for 6-8 hours during the day to support 8-10 hours of lighting at night, making them ideal for lawn decorations or garden paths. Their low brightness (usually 1-3W) is not enough to replace the main lighting, but it is enough to outline the landscape.

Ease of installation is another highlight: users simply insert the light into the soil or embed it into the ground without the need for an electrician. Some models are equipped with light sensors that automatically turn on the light when it gets dark, further simplifying the process and making them a popular item for DIY yard remodeling.
Motion Sensor In-Ground Lights
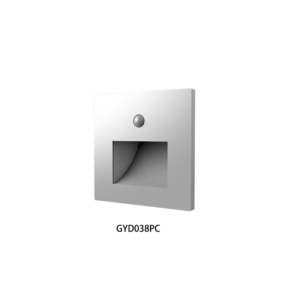
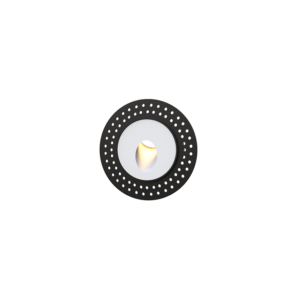
The dual demands of safety and energy saving have given rise to motion sensor landscape lights, which are integrated with infrared or radar sensors and can be automatically dimmed (e.g., 100% brightness) and delayed (10-60 seconds adjustable) when detecting the movement of people and vehicles, and then kept on standby with low power consumption (10-20% brightness) during normal times.

Typical application scenarios include private driveways, garden entrances, or warehouse perimeters. The sensing range usually covers a wide angle of 120° and a distance of 5 meters, effectively deterring potential intruders while avoiding false triggers (e.g., small animals passing by). Its “on-demand” feature reduces energy consumption by more than 70% compared to constant light mode, making it both practical and economical.
RGB / Smart In-Ground Lights
Customers seeking to personalize their courtyards are turning to smart in-ground lighting systems, which feature a built-in RGBW chip, 16 million colors, remote control via an app or voice assistant (e.g., Alexa/Google Home), and the ability to switch between scene modes (e.g., “Party Mode” for quick color change, “Festival Mode” for synchronized flashing).

Another innovation in color-changing outdoor ground lights is dynamic light effects, such as simulated flame jumps or water ripples, which add to the immersive experience of a pool, patio, or outdoor bar. Some high-end models even incorporate music synchronization, where the lights change to the rhythm of background music, transforming a patio into an open-air nightclub. Its intelligent features raise the initial cost, but provide differentiated competitiveness for high-end residential and commercial landscapes.
Application Scenarios and Design Inspiration
Garden/Lawn Edge
Underground lights are the “invisible paintbrush” that draws the border of nature. Installed linearly along the edges of flower beds, garden edge lights with warm white light (2700-3000K) are projected upwards to emphasize the layers of flowers and the contours of hedgerows, especially suitable for rose gardens or multi-layered hosta borders.

Design Inspiration:
- Interweaving of Light and Shadow: Embedded in the roots of the bushes, underground lights use the translucency of the leaves to form dappled light and shadow (with a suggestion: the soft light effect of the light penetrating the feather maple leaf blades).
- Curve Aesthetics: Irregularly spaced lamps are arranged along the meandering meadow walkway to simulate the mood of moonlight spilling down the path (keyword: landscape border lighting).
- Energy-Saving Solution: Choose low-voltage LED models under 3W with timers that automatically dim to 30% brightness at night, balancing ambiance and energy consumption.
Driveway/Walkway Lighting
Safety and functionality are the core of driveway lighting. Driveway in-ground lighting needs to meet the requirements of high brightness (12W or more is recommended), wide-angle illumination (120° beam angle), and IP68 waterproof rating to cope with vehicle crushing and rain erosion.
Design Points:
- Pressure-Resistant Structure: Choose aluminum alloy shell + tempered glass translucent cover, buried depth of not less than 10cm, to ensure that the load-bearing capacity is more than 5 tons (with the proposed figure: lamps embedded in the asphalt driveway sectional structure diagram).
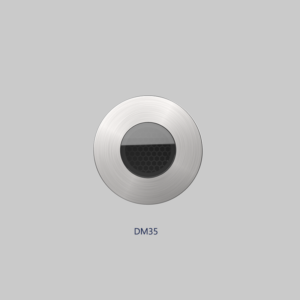
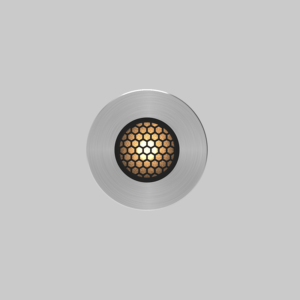
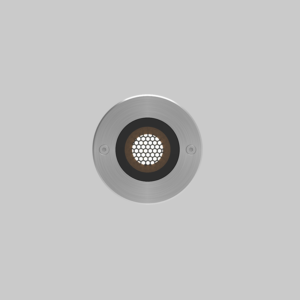
- Anti-Glare Design: Frosted cover or honeycomb grid is used to control the light at ground level to avoid interfering with the driver’s vision.
Outdoor Pool/Patio Area
In-ground lights can give soul to the water feature. Poolside ground lights need to be IP68 waterproof rated and equipped with anti-leakage protection, usually with 12V low voltage power supply to ensure safety.

Creative Applications:
- Underwater Light and Shadow: Embed RGB ground lights at the edge of the pool, and control the color change through an app to create an “underwater galaxy” effect (keyword: color-changing outdoor ground lights).
- Deck Focus: Warm glow underground lights are installed in the seams of the wooden deck to create a light and shadow dialog with the outdoor furniture (Suggestion: Minimalist style with light coming through the seams of the wooden flooring).
- Safety Enhancement: Use fixtures with tilt sensors at the edges of steps that automatically brighten to 100% brightness when a step is detected
General Tips Across Scenes:
- Light Color Matching: Cool white light (4000K) for functional areas (e.g., driveway), warm light (2700K) for leisure areas (e.g., terrace) to avoid visual fatigue.
- Hidden Wiring: Plan the piping trench in advance, install the transformer centrally in a waterproof junction box, and keep the ground tidy.
- Easy Maintenance: Choose the removable face ring design for easy replacement of LED modules or cleaning of the translucent cover.
How to Choose the Right Outdoor In-Ground Lights
Choose According to the Voltage (Low Voltage vs High Voltage)

12V/24V Low Voltage System:
- Ventaja: High safety (low risk of electric shock), suitable for home garden, compatible with solar power supply.
- Limitaciones: Need to configure additional transformers, long-distance transmission is prone to voltage drop (it is recommended to control a single line within 15 meters).
220V High Voltage System:
- Advantages: No transformer required, suitable for large landscapes (e.g., parks, commercial plazas), wider choice of lamps and lanterns power.
- Risks: Installation requires a professional electrician, buried line depth needs to be ≥ 50cm to prevent electric shock.
Scene Suggestions:
- Priority for 12V low voltage durable outdoor ground lights with intelligent dimmer for family courtyard.
- Municipal engineering or long-distance wiring (e.g., villa group) can consider 24V system to balance cost and safety.
IP Protection Level
- IP65: Dustproof + anti-spray (suitable for dry areas, such as the edge of the terrace).
- IP67: Dustproof + anti-submergence (1 meter water depth for 30 minutes, a must for swimming pools/fountains area).
- IP68: Dustproof + continuous diving (suitable for underwater installation, but at a higher cost).
Guide to Avoiding Pitfalls:
- Beware of the false propaganda of “IP65 pretending to be IP67,” and ask to see the test report.
- Focus on checking the sealing ring (silicone is better than rubber) and the waterproof nut of the terminal port.
Lamp Material and Lifespan
| Material | Advantages | Disadvantages | Escenarios aplicables |
|---|---|---|---|
| Aleación de aluminio | Good heat dissipation, lightweight | Salt spray environment easy to corrode | Inland courtyard |
| Stainless steel | Corrosion-resistant, high strength | High cost, high weight | Coastal/high humidity areas |
| Corrosion-resistant plastic | Low cost, good insulation | Easy to deteriorate, weak load-bearing | Temporary decorations/lawn |
Lifespan Reference:
High-quality LED buried lights have a theoretical life of 50,000 hours, but the actual impact of the environment (high temperature/humidity may be shortened to 30,000 hours).
Light Color Temperature (Warm White/Cool White/RGB)
- Warm white light (2700-3000K): To create a warm atmosphere, suitable for rest areas, flower beds (keywords: warm white in-ground lights).
- Cool white light (4000-5000K): To enhance safety, used for driveways, entrances (keywords: cool white LEDs).
- RGB full color: Holiday decoration or party scene, need to match with controller to realize dynamic mode.
Ambiance Tips:
- Mixed Color Temperature: Alternate warm white + cool white on both sides of the walkway to form a visual guide.
- Focused Lighting: Highlight the sculpture with cool white light, warm white light to accentuate the seating area and enhance the sense of spatial hierarchy.
Installation Tips and Precautions

Embedded Installation Steps:
- Positioning and Marking: Mark the position of the lamps and lanterns with spray paint to ensure uniform spacing (recommended 0.8-1.5 meters).
- Slotting and Digging Trench:
- Depth of burial ≥ 10cm (lawn area can be as shallow as 8cm, the driveway needs to be ≥ 15cm).
- Reserved Φ20mm PVC pipe for threading, the bends keep the R ≥ 15cm curvature.
- Cabling Connection:
- Use waterproof junction box, joints sealed with heat-shrinkable tube.
- Choose RVV 2×1.5mm² cable for the main line, and use RVV 2×1.0mm² for the branch line.
- Fix the Lamps and Lanterns:
- Pour fine sand to level the surface, put in the lamps and lanterns, and then fill the cement mortar (pay attention to the expansion joints of 2mm).
- Test the Power On:
- Check the lamps and lanterns one by one to see if they are flashing, and use the cell phone to check the stroboscopic flashing in the slow-motion mode.
- Fill the Backfill to Restore:
- Spread the grass seed on the grass area, and use epoxy resin to hook the joints to prevent water from being poured in the hard surface.
Key Notes:
- Drainage Design: Lay a 5cm gravel layer at the bottom of the luminaire to prevent water from corroding.
- Protection Upgrade: It is recommended to install spring shock-absorbing sleeve for driveway luminaire to resist vehicle crushing.
- Intelligent Expansion: Reserve zero line for later upgrading of smart switch (e.g., accessing HomeKit or Mijia).
Maintenance Tips:
- Check the seals before the rainy season every year and reapply waterproof adhesive with a silicone gun.
- Clean the translucent cover with a soft brush during the season of falling leaves to avoid scratches.
Care and Maintenance Recommendations
Cleaning the Surface of the Buried Light

Daily Cleaning:
- Remove leaves and mud from the crevices of the light fixture with a soft bristle brush or air pump (avoid scraping the translucent cover with a hard object).
- Wipe the surface of the lamp with a damp cloth dipped in neutral detergent every month; acidic/alkaline cleaners may corrode the material.
- Check for moss after rainy season, use diluted sodium hypochlorite solution (1:50) to gently wipe the surface.
Deep Stain Removal:
- Stubborn stains (e.g., bird droppings) need to be soaked for 5 minutes before wiping with a soft cloth, avoiding excessive force.
Replacement of Bulb and Waterproof Maintenance
LED Module Replacement:
- Disassemble the lamps after power failure, and give priority to the original module with the same specification (color temperature deviation ≤ 200K).
- Extreme environments (e.g., coastal areas) recommend replacing the module once every 3 years.
Waterproof Seal Check:
- Disassemble and inspect the seal ring every year, and replace the aged and hardened silicone ring immediately (Dow Corning 791 waterproof glue is recommended).
- Check whether the waterproof nut of the junction port is loose, if necessary, wrap the raw material tape to reinforce.
Key Maintenance Tips:
- Water Seepage Prevention Upgrade: Fill the bottom of the fixture with a 5cm layer of dry sand to prevent water from freezing and expanding (applicable in winter).
- Solar Models: Need to remove the battery pack after the rainy season and store it in a dry and ventilated place.
- Intelligent Monitoring: High-end models can be connected to a home energy management system to monitor the status of the luminaire in real time.
Long-Term Maintenance Strategy:
- Create a Maintenance Log: Record cleaning, parts replacement time, and pre-determine the life of consumables.
- Professional Overhaul: Every 2-3 years, invite an electrician to fully check the aging of the wiring (especially the high-voltage system).
User Frequently Asked Questions FAQ
(Structured data optimization to enhance search inclusion rate)
Q1: What are the best outdoor in-ground lights for driveways?
A: Priority is given to professional grade products with the following features:
- IP68 waterproof rating: Resist rain, snow, and vehicle crushing.
- 12V low voltage system: With 304 stainless steel housing to ensure long-term rust prevention.
- High brightness (12W+) and wide-angle beam (120°+): Such as Cree XTE series LED chips, covering a 5m wide lane.
- Pressure-resistant design: Burying depth ≥15cm, translucent cover adopts 5mm toughened glass (load-bearing capacity ≥5 tons).
Additional Suggestions:
- Reserve PVC threading pipe for later maintenance.
- With light + radar dual-mode sensor, to realize “lights on when cars come, lights off when cars go.”

Q2: Are in-ground LED lights waterproof?
A: Waterproof depends on IP rating and installation process:
- IP65: Anti-spray (suitable for dry area, such as edge of terrace).
- IP67/IP68: Anti-submergence (necessary for swimming pool/fountain area).
⚠️ Installation Key:
- Seals need to be replaced every year, and junction ports are sealed with 3M waterproof adhesive tape + heat-shrinkable tubes double sealing.
- Some cheap models are only waterproof for the outer shell, and the inner driver is not potted with adhesive, which is easy to be shorted out by using it for a long period of time.
Tips: Choose UL/CE certified products, check the “water immersion test” data in the test report.
Q3: How deep should I install in-ground lights?
A: Depending on the scene and material, the depth should be adjusted:
| Scenario | Recommended Depth | Caution |
|---|---|---|
| Lawn/Flower bed | 8-10cm | Avoid mower damage, 5cm sand layer at the bottom |
| Driveway/Sidewalk | 15-20cm | Anti-pressure and anti-grinding, translucent cover flush with the ground |
| Wooden deck | Surface installation | Embedded easy to cause moisture and rotting of the wood |
Extra Suggestion: Increase the depth of burying to 25cm in the cold area, to prevent expansion of freezing soil and damage to the lamps.
Q4: Can I use in-ground lights on wooden decks?
A: Yes, but you need to follow the specification below:
- Instalación: Choose special surface mounting fittings (e.g., stainless steel clips), avoid drilling.
- Heat Dissipation Design: Give priority to aluminum alloy base models, with 5mm clearance at the bottom for heat dissipation.
- Waterproofing Upgrade: Brush the joints between the fixtures and the decks with wood wax oil + Dow Corning 791 Silicone.
- ⚠️ Risk Tips: Thermal expansion and contraction of the wood may lead to the loosening of the fixtures, and the fixing screws need to be inspected every half a year.
Alternative: Consider low-voltage light strips embedded in deck seams for better concealment.
Q5: Do solar in-ground lights work in winter?
A: Available in winter but limited by the following factors:
- Sunshine Time: ≥4 hours of direct sunlight is required, and the efficiency drops 60% on cloudy days.
- Battery Performance: The efficiency of lithium batteries decreases by 30% below -10℃, and it is recommended to choose low-temperature-resistant models (e.g., lithium iron phosphate batteries).
- Cleaning Requirements: The solar panels need to be cleaned up in a timely manner after a snowfall, or else charging tends to be zero.
Optimization Suggestions:
- Adjust the angle of the mounting to 45° (30° in the summer), to maximize the absorption of light in the winter.
- Match with standby battery packs that can be manually replaced in extreme weather.